Add the skills to your agent
Open your agent, click Install Identity, and choose GOAT & Metis Agent — its three skills install onto that agent. (You install a curated identity, not individual skills.)| Skill | What it adds |
|---|---|
| Privy Wallet | create & manage a policy-guarded on-chain server wallet |
| ERC-8004 Registration | register the agent’s on-chain identity + reputation |
| x402 Merchant | accept x402 payments — receiving addresses, API keys, orders |
How the install works
These are external-source slugs, installed without a ClawHub registry:github.com/owner/repo[/subpath]→npx degitdownloads the repo (or just the.claude/skills/<name>subdirectory) as a tarball into~/.openclaw/workspace/skills/<name>.https://host/path/skill.md→ the runtime fetches the singleSKILL.mdand writes it under a folder named after itsname:frontmatter (e.g. Privy’shttps://agents.privy.io/skill.md→skills/privy-agent-onboarding/).
git binary is required (uses npx/node, already present). Registry slugs
(no github.com/ or https:// prefix) still go through clawhub install /
hermes skills install as before.
Credentials (required to transact — Phase 2)
Skills install with no credentials. The agent only signs/calls once these are present in the runtime’sopenclaw.json → env.vars:
| Var | Used by | Purpose |
|---|---|---|
PRIVY_APP_ID, PRIVY_APP_SECRET | Privy skill | create / manage the wallet |
GOAT_PRIVATE_KEY (or the Privy wallet — see “Signer”) | erc8004, x402 | sign on-chain transactions |
GOAT_NETWORK | erc8004, x402 | goat-testnet3 (default) or goat-mainnet |
GOAT_RPC_URL | erc8004, x402 | RPC endpoint (defaults below) |
ClawUp injects the model key + channel tokens into runtimes today, but there is
no path yet to inject these custom vars — that’s the Phase-2 work (a managed
wallet provisioner, or a bring-your-own-creds field). Until then, set them by
editing the runtime’s openclaw.json directly.
Signer: who holds the key?
Privy custodies the wallet key, but the GOAT skills sign with a rawGOAT_PRIVATE_KEY (cast / node src/contract.js). Pick one:
- (A) Privy is the single wallet — erc8004/x402 signing routes through Privy’s signing API. Best custody/policy; needs a small adapter so the GOAT skills sign via Privy instead of a raw key.
- (B) Separate raw key — give the GOAT skills their own
GOAT_PRIVATE_KEY; Privy is a second wallet. Simplest; two wallets.
Using the identity: wallet → ERC-8004 → x402
The skills are instructions the agent runs. Once the credentials above are in place, prompt the agent (chat) to perform each step, in order:- Generate the wallet — Privy skill. e.g. “set up my Privy wallet.” Runs the Privy CLI onboarding and provisions a server wallet.
- Fund it — testnet first: GOAT Testnet3 faucet
0x89e7dfd01a86e5393ce6d8A78c9aa6653Ee113A6. (The Privy skill can also fund.) - Register the ERC-8004 identity — erc8004-register skill. e.g. “register my
agent identity with URI
<agent_uri>.” Callsregister(string)on the Identity Registry, signed by the wallet (~156k gas). - Onboard as an x402 merchant — x402-merchant-onboard skill. e.g. “onboard me as an x402 merchant.” Sequence: register merchant → admin approval + fee-balance top-up → login → configure receiving address per token → generate API keys (HMAC-SHA256).
Walkthrough: provision the Privy wallet from chat
Step 1 above — “Generate the wallet” — end to end. The Privy skill (agents.privy.io/skill.md, from Privy’s
agent-CLI recipe)
runs entirely through chat. The screenshots below use Telegram.
Use any LLM model you like. The setup is model-agnostic — the agent reads
the skill and runs the same steps regardless of which model drives it. The
screenshots happen to use openrouter/openai/gpt-5.3-codex, but Claude,
GPT-5.x, DeepSeek, or any tool-capable model works just as well. Pick it at
create time under Model Usage — either Use your own API key (BYOK) or
Use ClawUp-managed models (token credits).
1. Create the agent
Create an OpenClaw agent, choose your model under Model Usage, and pair a channel (Telegram here) if you want to drive it from your phone.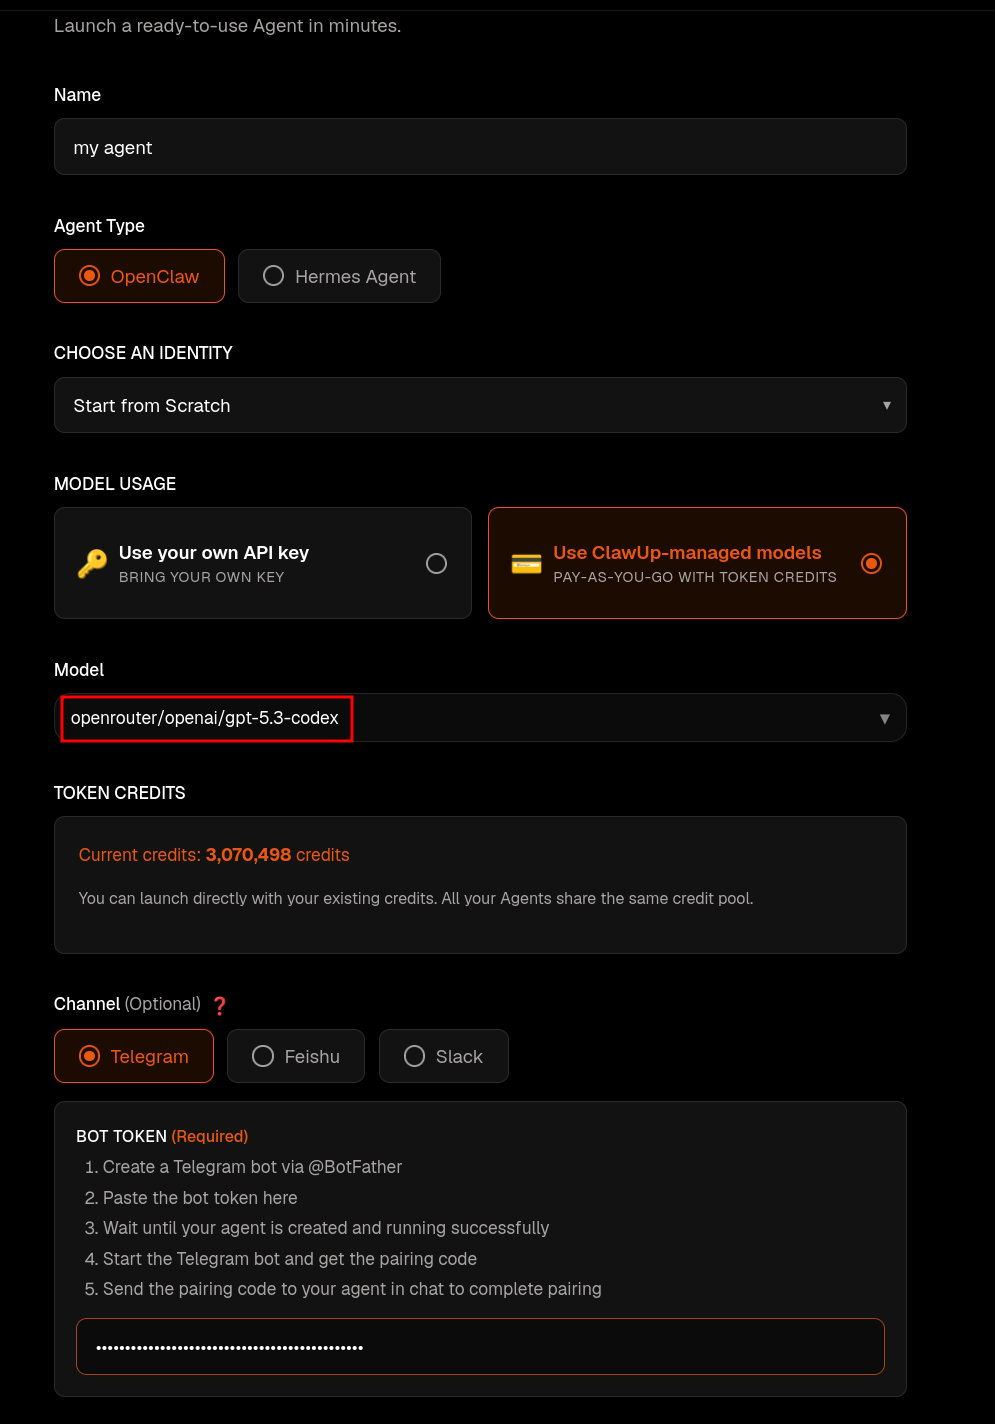
2. Install the Privy skill
In chat, point the agent at the Privy skill:https://agents.privy.io?user_code=…), and waits for your approval in the
background.
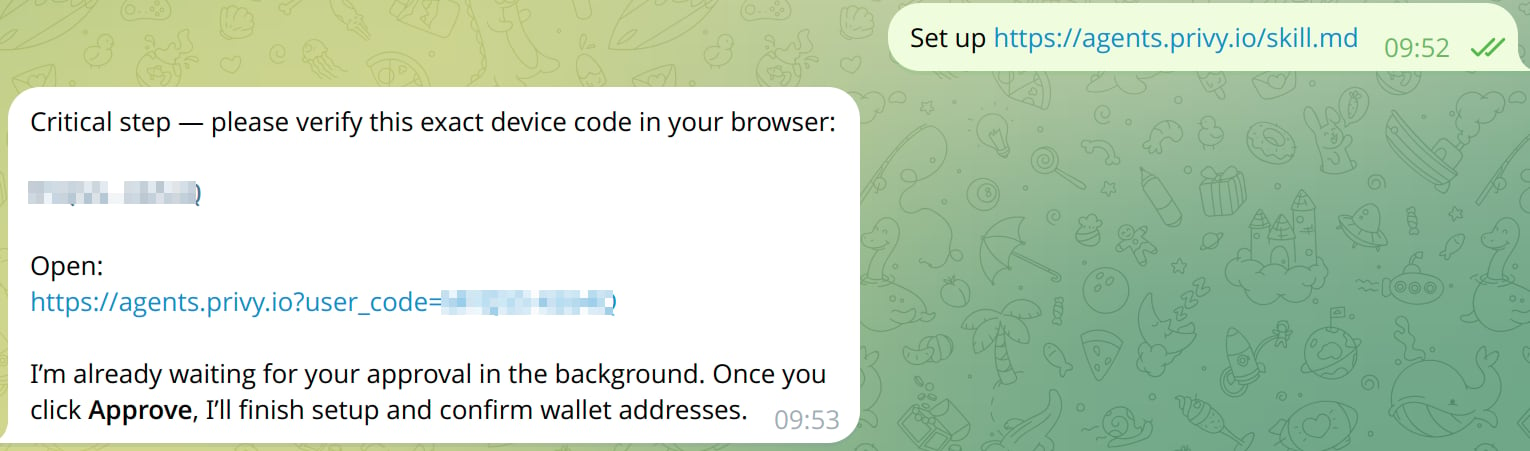
3. Log in & authorize
Open the link, log in to Privy, and Approve agent access — this grants the agent’s wallet CLI permission to sign and send transactions. Once you approve, the agent finishes setup and confirms the wallet addresses.
Because this login is interactive (device code → browser approval), the Privy wallet works today with noPRIVY_APP_*env vars to inject — you authorize in the browser instead of editingopenclaw.json.
4. Send a transaction
The agent can now transact in natural language. Fund the wallet first (a testnet faucet, or the Add funds button in the Privy sandbox), then: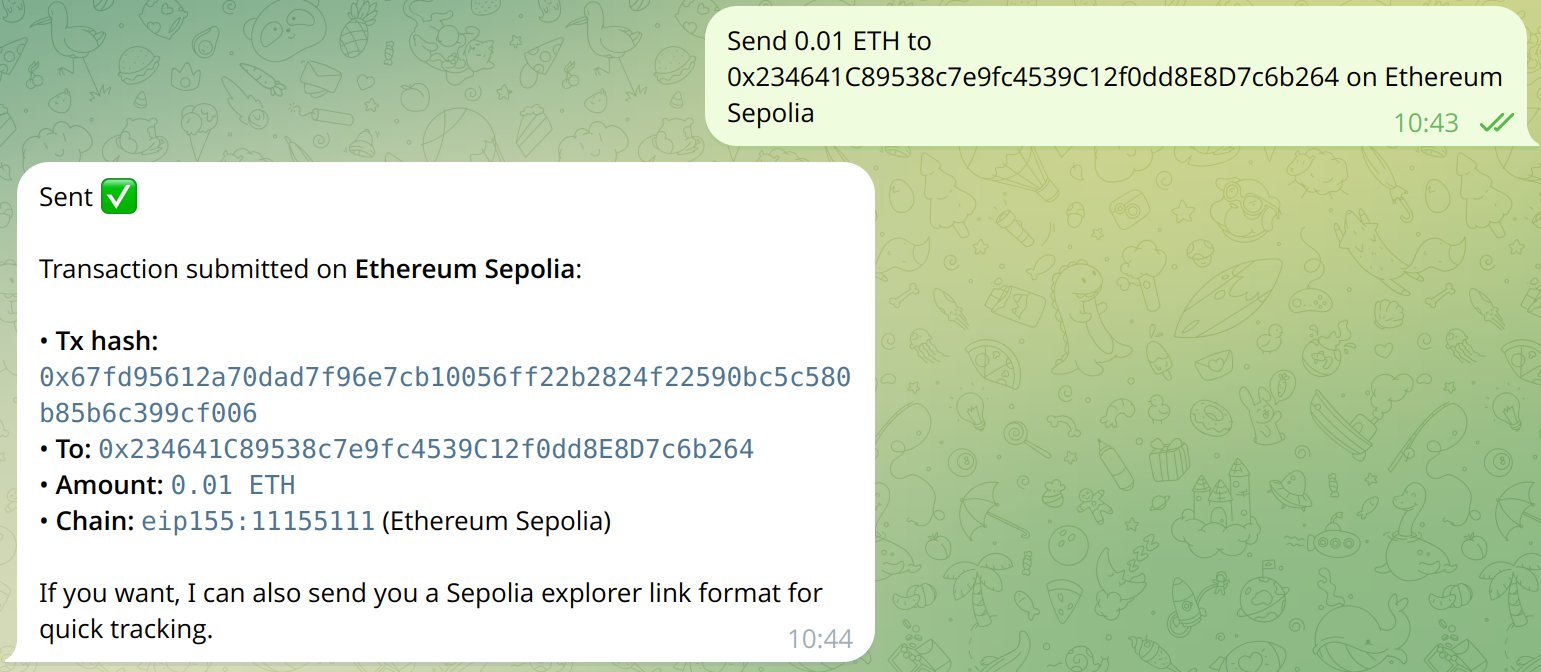
Network reference
| Testnet3 (default) | Mainnet | |
|---|---|---|
| Chain ID | 48816 | 2345 |
| RPC | https://rpc.testnet3.goat.network | https://rpc.goat.network |
| Explorer | https://explorer.testnet3.goat.network | https://explorer.goat.network |
| ERC-8004 Identity Registry | 0x556089008Fc0a60cD09390Eca93477ca254A5522 | 0x8004A169FB4a3325136EB29fA0ceB6D2e539a432 |
| ERC-8004 Reputation Registry | 0xd9140951d8aE6E5F625a02F5908535e16e3af964 | 0x8004BAa17C55a88189AE136b182e5fdA19dE9b63 |
| USDC | 0x29d1ee93e9ecf6e50f309f498e40a6b42d352fa1 | 0x3022b87ac063DE95b1570F46f5e470F8B53112D8 |
| USDT | 0xdce0af57e8f2ce957b3838cd2a2f3f3677965dd3 | 0xE1AD845D93853fff44990aE0DcecD8575293681e |
- ERC-8004 — both testnet3 and mainnet (registries above).
- x402 — both networks exist, but the hackathon skill defaults to testnet3:
- Mainnet — production GoatX402 API
https://api.x402.goat.network(multi-chain incl. GOAT mainnet2345). - Testnet3 — per-instance
https://x402-api-<instance>.testnet3.goat.network(portalhttps://x402-merchant-<instance>.testnet3.goat.network). - To run x402 on mainnet, set the skill’s base URL to
https://api.x402.goat.networkand chain2345; otherwise the skill’s hardcoded testnet endpoints keep it on testnet3. See GOATNetwork/x402 (DEVELOPER_FAST.md,API.md). (ClawUp’s billing also usesapi.x402.goat.networkviaX402_API_URL, but as ClawUp-the-merchant — separate from the agent.)
- Mainnet — production GoatX402 API
Further reading
- x402 on GOAT Network — the x402 payments portal and overview.
- Privy agent-CLI recipe — the wallet onboarding flow shown above.
Admin: provisioning
For node admins only — end users just attach the identity (above). The identity is data, created once in Settings → Identities → Create New Identity:- Slug
goat-metis-agent· NameGOAT & Metis Agent - Description: Give your agent an on-chain wallet, an ERC-8004 identity, and x402 payments on GOAT Network (and Metis-compatible EVM chains via Privy).
- Skills:
| Skill slug | Name |
|---|---|
https://agents.privy.io/skill.md | Privy Wallet |
github.com/GOATNetwork/GOAT-Hackathon-2026/.claude/skills/erc8004-register | ERC-8004 Registration |
github.com/GOATNetwork/GOAT-Hackathon-2026/.claude/skills/x402-merchant-onboard | x402 Merchant |