

- Create Your Agent for Free — deploy an AI assistant in seconds
- Pair Your Channel — connect Telegram, Feishu / Lark, or Slack and start talking
- Explore Tools — add tools and skills to make it smarter
Prerequisites
Before you begin, make sure you have:- A web browser (Chrome, Firefox, Safari, or Edge)
- A Google or GitHub account (for sign-in), or an email address
- A Telegram, Feishu / Lark, or Slack account — only needed if you want to connect a channel now. Connecting a channel is optional at create time; you can always chat via the built-in Web Chat first and add a channel later.
Step 1: Sign Up & Create Your Agent for Free
1.1 Create Your Account
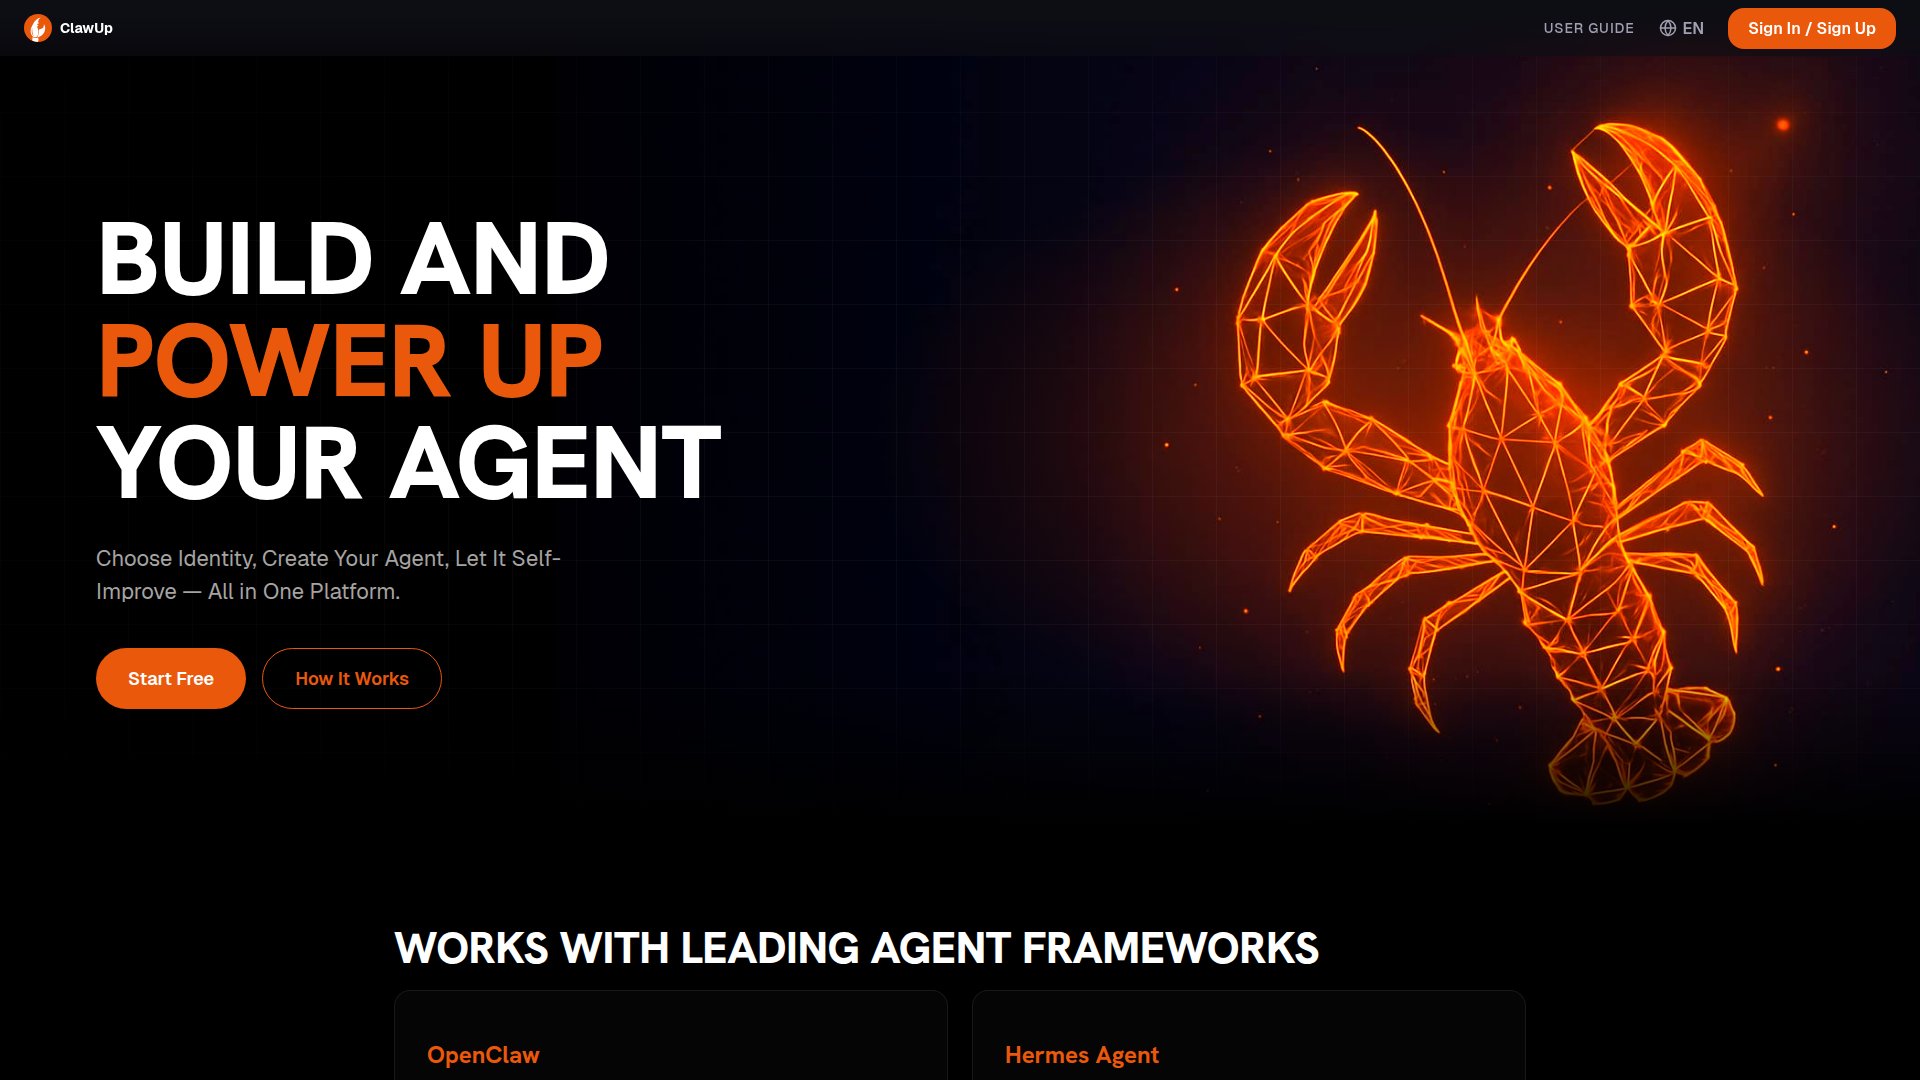
- Go to clawup.org
- Click Start Free, or Sign In / Sign Up in the top right
- On the sign-in screen, choose a method to continue:
- Google — sign in with your Google account
- GitHub — sign in with your GitHub account
- Sign in with Email — enter your email, click Send Code, then enter the verification code from your inbox
- Once signed in for the first time, you’ll land straight on the Create Your Agent form
💡 Tip: The email verification code expires in a few minutes. Check your spam folder if you don’t see it.
1.2 Create Your Agent
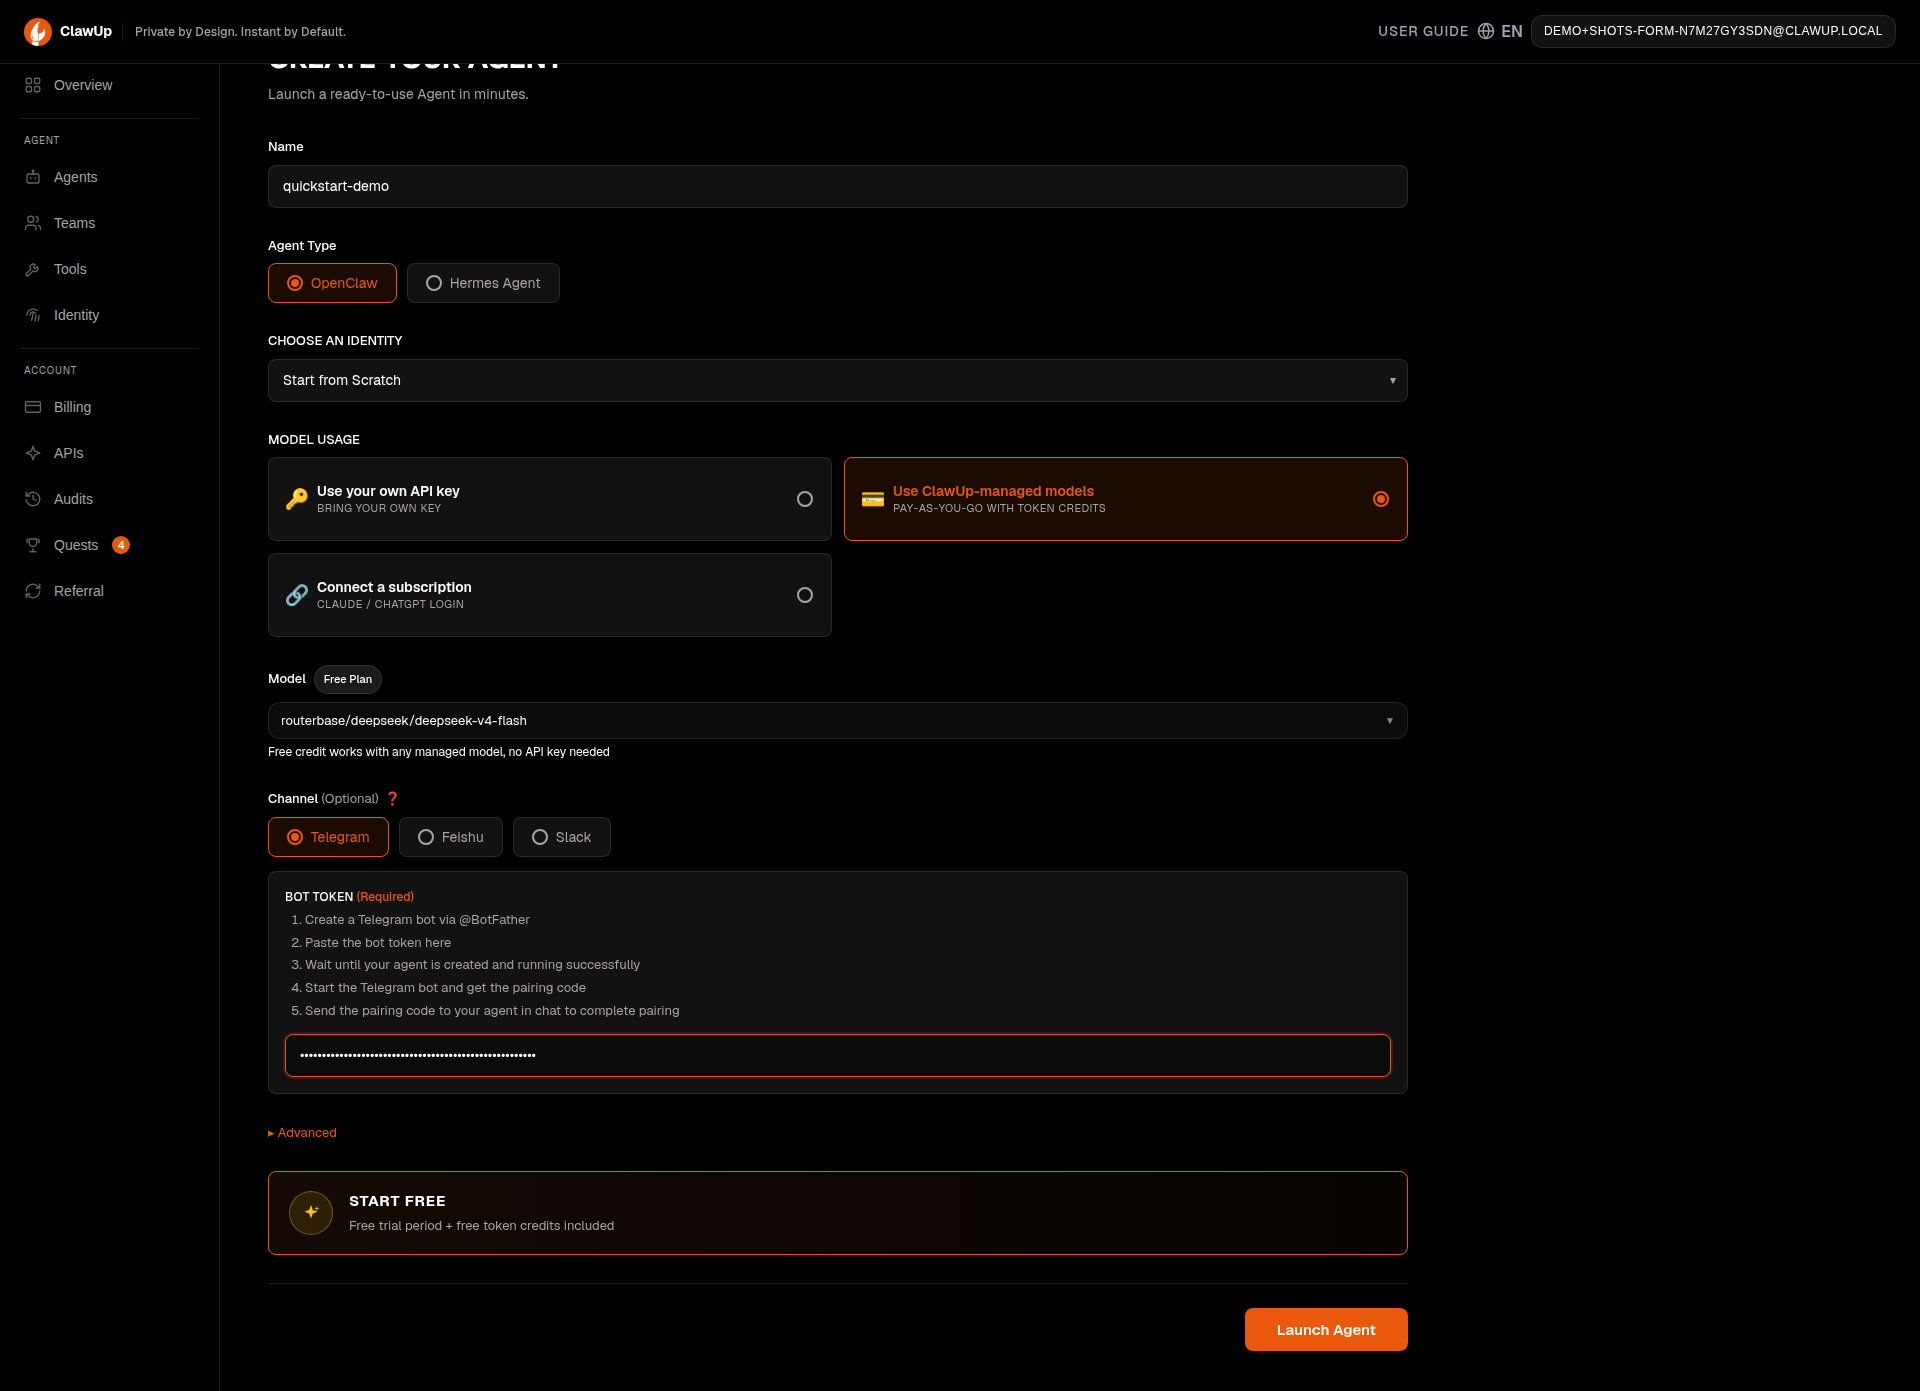
New accounts land directly on the create-agent form with the Free plan already selected — there’s no separate plan-picker page to click through first.-
Name — give your Agent a name (e.g.,
my-assistant) - Agent Type — the runtime engine. Defaults to OpenClaw (recommended, most mature path). Hermes Agent is available as an alternative — see Runtimes for the differences.
- Choose an Identity — optional. Leave it on Start from Scratch for a blank assistant, or pick a pre-built identity to auto-install its curated skills.
-
Model Usage — three ways to pay for model calls:
- Use ClawUp-managed models — pay-as-you-go with token credits; pre-selected for the Free plan, no API key needed
- Use your own API key — bring your own key (see the provider table below)
- Connect a subscription — sign in with an existing Claude or ChatGPT subscription instead of a key; see Connect a Subscription
-
Model — for the Free plan this is pre-filled and shown with a Free Plan badge (currently a fast managed model, e.g.
deepseek-v4-flash). Free credit works with any managed model — no API key needed. For Use your own API key, pick a model with the searchable model picker (OpenAI, Anthropic, Google, etc.) and provide a key: -
Channel (optional) — pick a messaging platform to connect now, or skip it and add one later:
See Connect Channel for step-by-step instructions.
- Click Launch Agent
Advanced Options
Click Advanced to expand these options. Defaults are auto-selected for most users.1.3 Wait for Deployment
After clicking Launch Agent, your assistant will be provisioned:- Status:
creating→setting up→running - This typically takes 1–3 minutes
- Once the status shows running, your Agent is live!
Step 2: Pair Your Channel
If you connected a channel above, complete the pairing process below to start chatting from Telegram, Feishu, or Slack. Skipped this step? You can still chat via the built-in Web Chat, and add a channel later from your Agent’s Overview page.2.1 Pair Telegram
-
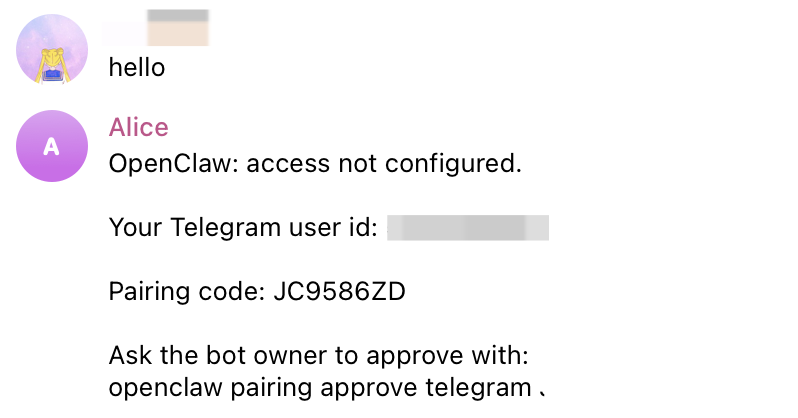
Chat via Telegram — Open Telegram and find your bot. Send a message — the bot will reply with a pairing code, for example:
“Ask the bot owner to approve with:
Copy the entire command.openclaw pairing approve telegram XXXXXXX” - Chat via Web (Built-in) — Go back to the ClawUp Dashboard → Overview → Open Agent Chat. Send the full pairing code to your Agent.
-
Your Agent will reply: “Telegram has been approved”. If your Agent does not indicate success, send this message to your Agent:
Configure Telegram, run the command:
openclaw pairing approve telegram XXXXXX - Go back to Telegram and send a message to your bot — the bot should reply. Your Telegram channel is now connected! ✅
2.2 Pair Feishu / Lark
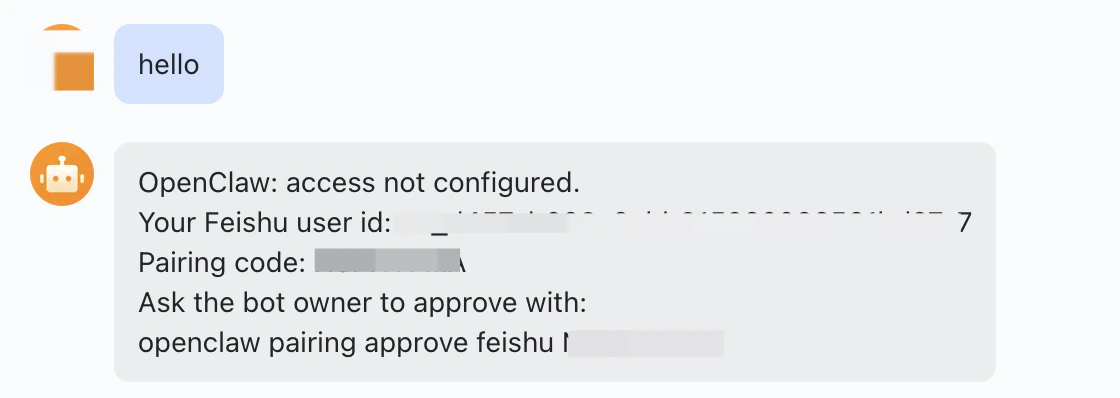
- Chat via Feishu — Open Feishu and find your bot. Send a message — the bot will reply with a pairing code. Copy the entire command.
- Chat via Web (Built-in) — Go back to the ClawUp Dashboard → Overview → Open Agent Chat. Send the full pairing code to your Agent.
-
Your Agent will reply: “Feishu has been approved”. If your Agent does not indicate success, send this message to your Agent:
Configure Feishu, run the command:
openclaw pairing approve feishu XXXXXX - Go back to Feishu and send a message to your bot — the bot should reply. Your Feishu channel is now connected! ✅
2.3 Pair Slack
- Chat via Slack — In the Slack workspace where you installed your app, open a DM with the bot (or mention it in a channel it’s in). Send a message — the bot will reply with a pairing code, similar to Telegram/Feishu above.
- Chat via Web (Built-in) — Go back to the ClawUp Dashboard → Overview → Open Agent Chat. Send the full pairing code to your Agent.
-
Your Agent will reply: “Slack has been approved”. If your Agent does not indicate success, send this message to your Agent:
Configure Slack, run the command:
openclaw pairing approve slack XXXXXX - Go back to Slack and message your bot — it should reply. Your Slack channel is now connected! ✅
💡 Tip: Web Chat is useful for quick testing. For daily use, Telegram, Feishu, or Slack provides a much better experience with notifications, mobile access, and rich media support.
Step 3: Explore Tools
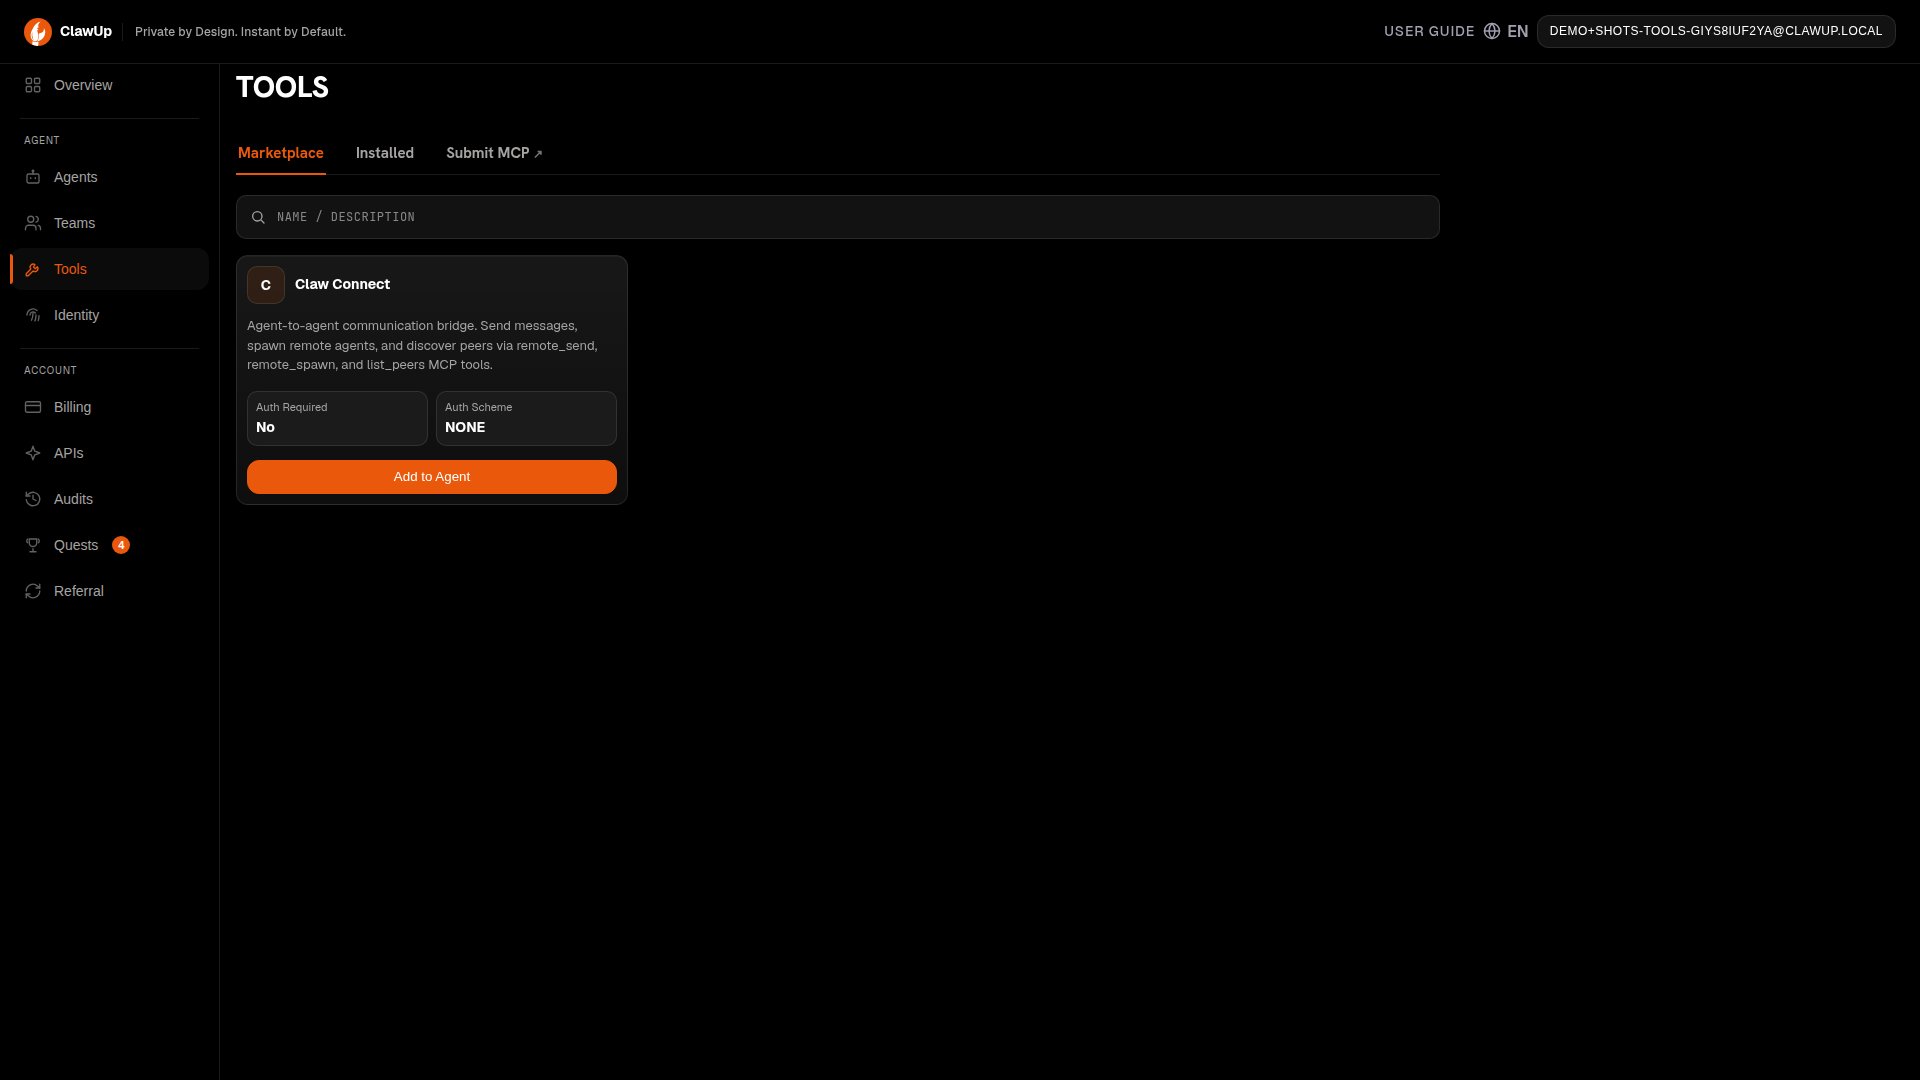
Make your Agent smarter by installing tools from the Marketplace.- Click Tools in the left sidebar → you’ll see the Marketplace tab
- Find a tool you want (e.g., Claw Connect for agent-to-agent communication)
- Click Add to Agent, select which Agent to install it on
- If the tool requires an API key, enter it when prompted
- The tool is now active — your Agent can use its capabilities!
Troubleshooting
What’s Next?
- Customize your Agent’s personality by editing its system prompt
- Create a Team — go to Teams in the left sidebar to build a multi-agent group from templates or AI generation. See Teams for details.
- Set up scheduled tasks with cron jobs
- Bring your own API key or top up Token Credits for more model choices and higher usage limits
- Join the ClawUp community on Telegram: @clawup
- Documentation: docs.clawup.org
- Community: t.me/clawup